|
It's strange, isn't it, that there's so many image processors around these
days? At one time the choice was simple. There was the Atari Image Manager
(AIM) - a programme that only a few devotees ever got to grips with - and
that was it. Image processing was a black art confined to Universities,
the military and NASA.
The legacy of this was that most image processors were so technically
biased that most users never got beyond the play slopes. You knew they
were capable of marvellous effects - their example pix were invariably
stunning - but your own attempts always seemed to end up as a white smudge
on a black ground.
And that's why I'm so impressed with MGIF v5.01. It's a technical
programme, written by a technically-minded programmer, but it comes with
enough explanation, examples and documentation that even a neophyte can
produce equally stunning results within the shortest possible time.
And it's also free; a major selling point. So I loaded it onto my hard
drive and took it for a spin on a 4Mb STE with a high res monitor.
But what does it do?
MGIF is an image processor and picture displayer that runs in any Atari
resolution up to and including True Colour on the Falcon. It preserves the
colour depth of the original image regardless of the current display
resolution, and it allows you to work on either single colour channels
(Red, Green or Blue) or all the RGB channels combined.
To translate that into plain English, it means that you can alter,
display, convert and save pictures with a far larger number of colours
than can ever be shown on the screen. A dithered representation is
displayed, but the image itself remains unchanged in memory and can be
worked on and saved without any form of dithering or colour reduction
being imposed on it.
MGIF can be run as a TOS, GEM or GTP programme. Most users will probably
want to run it as a GEM programme (the TOS version is for use with MinT),
but it can also be set up to act as a slideshow or installed from the
Desktop to work as a picture viewer.
It runs on any ST, STe or Falcon (using the DSP chip to full advantage)
and can load JPG, JPE, GIF '87 & '89, TGA, PPM, PI1/2, AIM, and (X)IMG
pictures, along with its own .FL (Flicker) format. The results can be
saved in GIF '87, TGA, PPM, or .FL formats, as well as monochrome IMG
files for use in WP and DTP progs. I was surprised that MGIF couldn't load
or save in Tiff format - the image processing standard - but that's a
minor problem that can be easily overcome with a decent picture converter.
The 'IMG save' option is particularly well handled, as it gives you the
choice of saving the image with either with Floyd-Steinberg dithering (for
use on screen) or with an ordered dithering that's more suitable for
printing. Another welcome refinement is the option to save the output at
any given size (in pixels, cm or inches), and at any DPI (Dots Per Inch)
setting to match your printer. This means that the dimensions shown on
screen are the ones that the image will occupy when printed on the page.
And how does it do it?
MGIF's image processing options operate on two different levels:
alterations to each pixel, or alterations to a 3 x 3 grid of pixels.
Anyone used to other image processing programmes will be surprised at how
little time these operations take.
The individual pixel options include: Histogram Equalise, Invert, Log
Scale, Threshold Setting, Contrast Expansion, Brighten and Darken. These
are relatively straightforward operations that affect the tonal balance,
contrast or intensity of a picture.
The area operations are: 3x3 Convolutions (Low Pass 1-3, High Pass 1-3,
Laplace 1-3, Shift Diff, Smooth, Grad. Dir., Kirsch, Sobel and Line), plus
Blur, Local maximum (erosion), Local minimum (dilation), Median, Oil and
Pixelise. These operations, or 'filters', can be altered in many ways and
are used to extract the edges of an image, sharpen it, produce an embossed
image, blur it (soft focus), remove 'noise', disguise previous dithering,
or even to produce a pixelated 'Crimewatch' effect on a familiar face.
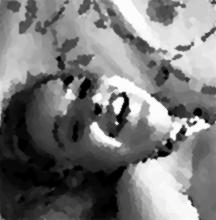
My own favourite is the Oil Paint filter that averages small areas of any
picture and then represents them as oval brushstrokes. Running a picture
through the filter several times results in an almost Impressionist style
that can turn a face or a nude (for example) into a work of art.

|

|
|
Before
| After |
Pictures can also be re-sized, mirrored, trimmed and rotated, and can even
be given a coloured border with a user-defined width.
First impressions
I found MGIF rather confusing at first, but its comprehensive on-line help
meant that I was soon using it with a confidence that I hadn't felt with
other programmes of its type. (The on-line help comes in the ST Guide
hypertext format, so you'll need a copy of ST Guide to get the most from
MGIF.)
The help file includes simple definitions of the key image processing
concepts, such as: histograms; greyscale, mapped and 24-bit colour;
ordered dithering; Floyd-Steinberg dithering; halftones and convolutions.
It also includes brief but informative tutorials that explain in plain
English the effects and uses of all the various filters, and the programme
comes with a series of pictures that show the effect of each filter on a
small example picture. The quality of the documentation, for once, matched
the professionalism of the programme itself.
And in practice...
On loading, an 'Initialisation Box' appears that allows you to allocate
the amount of memory the programme will use, and whether MGIF should run
in 'Flicker', normal, or a 24-bit mode that uses one buffer per colour
channel. You can also opt for single buffers and screens if you're running
the programme on a smaller memory machine.
The 'Flicker' option is for mono monitor users and shows MGIF's origins as
a pseudo-greyscale Gif viewer. The image is loaded, converted to
greyscale, and then drawn rapidly on the screen with an ordered dither,
followed by a Floyd-Steinberg dither. The two images are then displayed
alternately at high speed to give an impression of a greyscale picture on
a mono monitor. It sounds crude, but it looks superb! (The Flicker mode
can also be used for colour pictures, but I wasn't able to test that as I
only had a mono monitor to hand.)
MGIF uses the idea of Source and Destination buffers: a 'before' and
'after' approach that makes it almost impossible to over-write the
original image. It took me a while to get used to this, but once I had I
found this method surprisingly easy to use. The 'Source' buffer remains
unaltered during any operation, and the result is then viewed from the
'Destination' buffer. The Source and Destination buffers can be
interchanged if necessary, and this means that you can carry out repeated
operations by copying the results to the Source buffer and repeating the
operation once more.
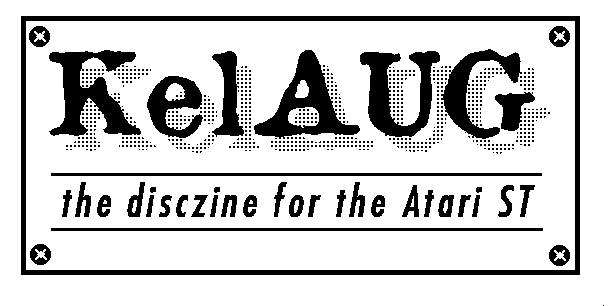
To show what MGIF is capable of, here's a few pictures that show the
different stages I went through while creating a logo for the Kelstar
Atari User Group. I already had a IMG file that I'd 'made earlier' with
Textstyle and Megapaint, so I loaded it into MGIF and waited a few seconds
while it converted it from bitmap to greyscale, all ready to be
manipulated.

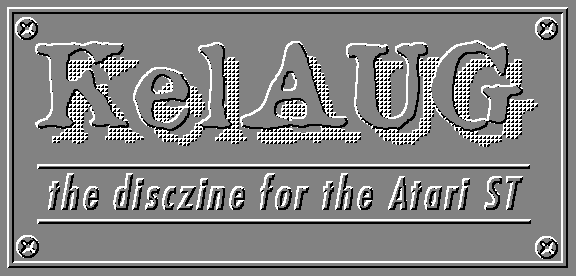
The image was then embossed by using a Kirsch filter set from the NW
direction with a bias of 130. This is how it appeared in the Destination
buffer, before being moved back to the Source buffer for the next
operation:

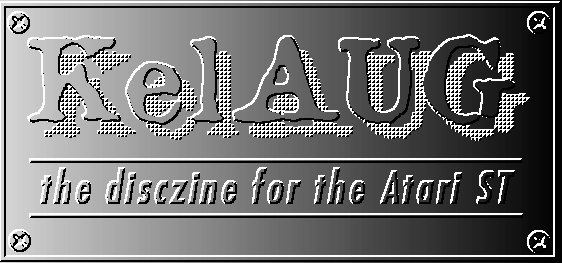
So far, so good, but the next stage gave it that extra-added magic that
I'd been looking for. I used MGIF's 'Linear shade' option to create a
greyscale fade, altered a couple of settings and then added it to the
embossed image with the 'Combine' function. Voila - one shiny metal logo
ready to be saved out as either a greyscale Gif or a half-tone IMG file
all ready for printing. (And all with the very minimum of skill and effort
on my part...)

Conclusions
The only drawbacks I've found with MGIF are that (i) you can't load or
save TIFF images, and (ii) that you can't save your current configuration:
the settings can only be made permanent by exiting the prog and editing
the Options file by hand.
MGIF is a professional and well thought out programme, and one that's
easier to use than most other image processors. It's fast and reliable,
but its documentation needs to be read thoroughly if you're to get the
best from the programme. In short, MGIF takes a while to learn, but its
possibilities more than justify the effort.
| 


